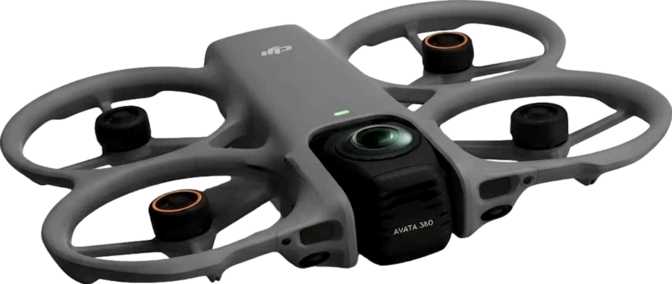
DJI Avata 360 Full Review: The FPV Drone That Shoots Everything
DronesKey Specifications at a Glance
Core performance numbers — and why each one matters for your flying and shooting
Most drones force you to choose: cinematic wide-angle footage or the raw, immersive rush of first-person flight. The DJI Avata 360 refuses that compromise. It pairs the adrenaline-forward DNA of DJI's Avata lineage with a full 360-degree imaging system — meaning every flight captures everything, in every direction, simultaneously. That is not a minor upgrade. It is a fundamentally different way of thinking about aerial footage.
Whether you are a content creator tired of repositioning for every single shot, an action sports filmmaker who cannot afford to miss a moment, or an FPV enthusiast who finally wants professional-grade footage to match professional-grade flying, the Avata 360 is built with your frustrations in mind. This review breaks down exactly what that means in practice — and where the drone still asks for trade-offs.
Design and Build: Compact for Its Ambitions
At 246mm wide and 199mm deep, the Avata 360 occupies a compact footprint that sits comfortably between a beginner toy and a full professional rig. The 55.5mm height keeps the profile low and aerodynamically clean. Total volume comes in just under 2,720 cubic centimeters — meaning this is a genuinely portable machine relative to the imaging system it carries.
The 455-gram weight deserves your attention before you buy. In most countries, drones exceeding 250 grams require registration and operate under stricter rules than lighter consumer models. If you are new to drone ownership, research your local regulations before your first flight. That said, 455 grams is a reasonable trade-off for the hardware packed inside — and light enough that the drone handles wind and direction changes with agility rather than sluggishness.
The removable battery design is a practical win. Unlike drones that require you to carry the entire unit to a charging point, you can swap cells in the field and keep flying. For anyone shooting all-day events or extended outdoor expeditions, this matters more than almost any other physical feature.
Physical Dimensions
| Width | 246 mm |
| Depth | 199 mm |
| Height | 55.5 mm |
| Weight | 455 g |
| Volume | 2,717 cm³ |
| Battery | Removable |
The Imaging System: What 360 Degrees Actually Means
Four components that work together to redefine what aerial footage can look like
8K Resolution at 60 Frames Per Second
The main camera records at 8K-class resolution — approximately sixteen times the pixel information of standard 1080p HD. More importantly, it does this at up to 60 frames per second. For aerial content, high frame rates mean you can slow footage down in post-production without losing sharpness or introducing motion blur. A fast-moving subject — a mountain biker, a surfer, a racing car — captured at 60fps and slowed to 24fps delivers smooth, cinematic slow-motion that looks deliberate rather than accidental. Even after heavy cropping to reframe a 360-degree shot into a conventional widescreen or vertical cut, you retain more than enough detail for professional delivery on any screen.
64 Megapixels for Still Photography
The still camera produces images large enough for large-format printing, commercial licensing, or aggressive cropping without visible quality loss. Combined with the 360-degree field of view, a single overhead hover can yield a complete panoramic image of an entire landscape — no sweeping arc needed, no separate shots to stitch manually. The drone handles panoramic image assembly directly on board, delivering a finished file without any desktop software required.
180 Mbps Recording Bitrate
Bitrate is how much visual data the drone records per second of video. At 180 megabits per second, the Avata 360 captures an extensive amount of detail — this directly translates to nuance in shadows, smooth gradients across skies, and footage that holds up well during color grading. Lower-bitrate cameras produce footage that looks fine on a phone screen but deteriorates on a large monitor or under heavy editing. At this recording rate, the material captured is genuinely edit-friendly, not just a preview of what could have been captured.
HDR, CMOS Sensor, and the FPV Camera
The built-in HDR mode allows the camera to balance exposure across bright and dark areas of the frame simultaneously — critical for aerial work, where you are almost always fighting the contrast between a bright sky and a shadowed landscape below. Without it, you either blow out the clouds or lose detail on the ground. The CMOS sensor at the heart of the imaging system underpins all of this; the combination of 64MP resolution, 180 Mbps bitrate, and 8K/60fps output places this in the upper tier of consumer-to-prosumer aerial cameras.
The separate FPV camera is worth calling out explicitly. It provides a real-time first-person view feed to your controller, independent of the main recording camera. You navigate through a live FPV view while the 360-degree camera captures everything around you — your attention stays on the flight path, and the camera handles comprehensive coverage autonomously.
Flight Performance: Range, Speed, and Endurance
Supports 2–3 meaningful shooting passes per battery. Carry 2–3 cells for a full day without needing a power source nearby.
Under ideal line-of-sight conditions. Real-world urban range is shorter, but signal will not be your practical limiting factor.
Agile enough for cyclists, boats, and moderate-speed vehicles for tracking shots. Not intended for racing applications.
In practical terms, a single battery supports roughly two to three meaningful shooting passes at a location. For a day trip, carrying two or three batteries — a common practice among serious drone users — means several hours of intermittent shooting without needing an external power source. Twenty-three minutes is a competitive figure for a drone of this capability tier, reflecting a balanced trade-off between battery weight, aircraft weight, and the demands of an 8K imaging system.
The 20-kilometer transmission range assumes ideal, unobstructed conditions. In real-world environments, physical obstacles and radio interference will reduce this number. The practical implication is simple: signal quality will not be your limiting constraint during any normal shooting scenario — you will exhaust the battery long before you approach the edge of the transmission envelope.
Safety and Intelligent Flight Systems
Obstacle Detection
Sensors identify physical objects in the drone's path and initiate automatic avoidance. For beginners, this is the single most important safety feature on any drone — it significantly reduces crash risk during learning flights and in tight environments. For experienced pilots, it is a useful assistant rather than an absolute override: sensor performance can vary in dense canopy or low-light conditions, so treat it accordingly.
Return to Home
If the drone loses its controller connection, drops to a critical battery level, or the pilot triggers it manually, the RTH system navigates the drone back to its recorded takeoff point and lands automatically. Combined with GPS positioning throughout the flight, this dramatically reduces the risk of a lost or stranded aircraft in virtually any scenario.
Intelligent Flight Modes
Automated sequences allow the drone to execute complex maneuvers with minimal pilot input. For this capability class, this typically includes subject tracking, orbit shots, waypoint navigation, and one-touch cinematic moves — all particularly valuable for solo operators who are simultaneously pilot and camera operator with no second person to help.
Storage: On-Board and Expandable
The 42GB of built-in storage is enough to hold a meaningful amount of 8K/60fps footage — though high-bitrate recording at full resolution will consume that space faster than lower-quality settings. The external memory card slot gives you the flexibility to carry as much capacity as a shooting day demands. For serious work, loading up high-capacity cards and swapping between them is a practical, low-friction workflow.
The two-tier architecture also means that even if you arrive at a location without your memory cards, you are not grounded — you have a usable buffer immediately available. Treat the internal 42GB as your safety net and your memory card as your primary archive.
Controller and Smartphone Integration
Built-in Display Remote
The included remote control has its own integrated display — you do not need your smartphone to see what the drone sees. This provides a reliable, direct live feed without the latency, glare, or battery drain concerns that come with phone-based setups. For pilots who want to concentrate fully on flying without managing a second device, this is a meaningful quality-of-life feature.
Smartphone Connectivity
Smartphone support is also available for pilots who prefer a larger screen, want to use companion apps for flight planning, or need to quickly review and share footage directly in the field. The two options complement rather than compete — the choice comes down to workflow preference, not a hardware limitation. Neither is required at the expense of the other.
Operating Conditions and Practical Limits
The Avata 360 operates in temperatures from -10°C to 40°C (14°F to 104°F). This covers the vast majority of real-world shooting environments — from a cold alpine morning to a hot summer day in an arid location. It is not rated for extreme cold operations and should not be flown in precipitation without additional protection.
At the lower temperature limit, battery performance will degrade faster than in warm conditions — a universal characteristic of lithium-based batteries rather than a design flaw. In freezing weather, expect modestly shorter flight times than the rated 23-minute maximum. A practical tip: keep your spare battery in a warm inner pocket before swapping it in, which helps preserve capacity in cold conditions.
50°C total operating range
Who the DJI Avata 360 Is For
An excellent match for:
- Solo content creators who cannot afford to miss a moment — 360° capture records every angle simultaneously without repositioning
- Action sports videographers covering fast, unpredictable subjects where setting up another pass between takes is not an option
- Travel filmmakers and photographers who want a single aerial tool that delivers sweeping stills and cinematic video equally well
- FPV enthusiasts who want the immersive flying experience with footage that meets professional delivery standards
- Event and wedding aerial cinematographers who need maximum coverage flexibility from a limited number of flights
Not ideal for:
- Pure racing or freestyle FPV pilots for whom weight, speed ceiling, and aerobatic range matter more than camera output
- Buyers with strict sub-250g regulatory requirements — at 455 grams, this drone falls into registered categories in most regions
- Photographers who need a drone primarily for mapping, surveying, or technical photogrammetry workflows requiring specialized sensor packages
- Anyone who puts maximum flight time above all else — 23 minutes per charge is solid but not the longest available at this price tier
How the Avata 360 Compares to Its Alternatives
The Avata 360's differentiation is holding both FPV flying capability and 360-degree cinematic imaging at 8K — a combination most alternatives sacrifice one half of.
| Feature | DJI Avata 360 | Typical FPV Drone | Typical 360 Camera Drone |
|---|---|---|---|
| Field of View | Full 360° | Fixed wide-angle | Full 360° |
| FPV Feed | Rarely | ||
| Video Resolution | 8K / 60fps | 4K–6K typical | 5.7K–8K typical |
| Recording Bitrate | 180 Mbps | 50–150 Mbps | 60–120 Mbps |
| Obstacle Detection | Rarely | Often | |
| Intelligent Flight Modes | Rarely | Often | |
| Flight Time | ~23 min | 15–20 min | 20–28 min |
| Onboard Storage | 42 GB | Rare | Occasional |
| Weight Class | 455g (registered) | Varies widely | 300–600g typical |
Typical category specs represent common market alternatives. Individual models will vary.
Honest Assessment: Strengths and Where It Falls Short
The Avata 360's strongest argument is its capture philosophy. Recording every direction simultaneously eliminates the single biggest failure point in aerial filmmaking: the camera was pointing the wrong way. At 8K resolution with a 180 Mbps codec, the latitude to crop and reframe in post is genuine, not theoretical. The simultaneous FPV feed alongside 360-degree recording is a thoughtful engineering decision — navigate with the FPV view while the main camera handles comprehensive coverage. For a solo operator, that workflow independence is genuinely valuable.
What It Gets Right
-
Omnidirectional capture eliminates missed shotsEvery direction recorded simultaneously — no repositioning required between takes
-
Genuinely edit-friendly footage8K at 180 Mbps provides real post-production flexibility for grading and reframing
-
FPV and 360° recording are fully independentNavigate with the FPV feed while the main camera captures omnidirectionally
-
Safety systems reduce risk meaningfullyObstacle detection and RTH provide genuine protection, especially for newer pilots
-
Flexible two-tier storage42GB internal plus expandable card slot — no single point of storage failure
What You Need to Accept
-
Weight triggers registration requirementsAt 455g you will need to register this drone in most countries before legal flight
-
Flight time demands battery planning23 minutes per battery is solid but not generous — full shooting days require multiple cells
-
Top speed limits certain use cases38.5 km/h rules out high-speed vehicle tracking and any racing application
-
Cold weather reduces battery lifeLithium battery performance drops in low temperatures — expect less than 23 min in freezing conditions
Answers to Common Pre-Purchase Questions
The questions real buyers search before spending their money
Final Verdict
The DJI Avata 360 — who it is for, and why
The DJI Avata 360 is a genuinely specialized tool that solves a real problem. If you have ever returned home from a flight to find that the critical moment you needed was the moment the camera was pointing elsewhere — this drone is the answer to that frustration.
The combination of 360-degree imaging at 8K resolution, a live FPV pilot feed, obstacle detection, intelligent automation, and professional-grade bitrate recording in a 455-gram body is a technically compelling package. It is designed for operators who fly creatively, shoot professionally, and want a system that captures comprehensively rather than selectively.
It is not the right drone for everyone. The weight places it in regulated territory, the flight endurance requires active battery management, and the use-case fit narrows toward working creators and professionals rather than casual hobbyists looking for a weekend flier.